In my daily work I use Sublime Text Editor for writing CloudFormation templates. I use it for anything that needs editing, but for this article I will focus on CloudFormation. There are a few reasons I use this over other editors. It supports a high number of syntaxes, themes and plug-ins. But aside from when I started using it the main reason was its availability on multiple OS’s. At work I use Windows, home is MacOS and Ubuntu (yes, I have a dedicated Ubuntu laptop) and finding programs that work on all 3 is almost impossible. Sublime Text Editor 3 works on all them and once you learn the shortcuts and how to get around it, that translates to the other OS’s.
Let’s begin…
First, go to the site and grab the download for your OS. https://www.sublimetext.com/ This program is what they call “nagware” and will ask you to support it once in a while, but it is otherwise fully functional. Install the download and load it up!
Out of the box, it will support JSON and YAML syntax but let’s enhance all of this for CloudFormation. I use JSON because I find it easily readable (yeah, yeah, I know YAML people, this is just how I learned) and one of the plug-ins I use offers snippets that are JSON only. When I am done I use another plug-in to convert and save it YAML. Let’s install what you need.
BracketHighlighter example – start by pressing (on MacOS) command+shift+p or (on Windows) ctrl+shift+p and loading up the Sublime Command Palette. This brings up a dialog box that I would call Sublime’s CLI. When this box appears type “install” to get this:
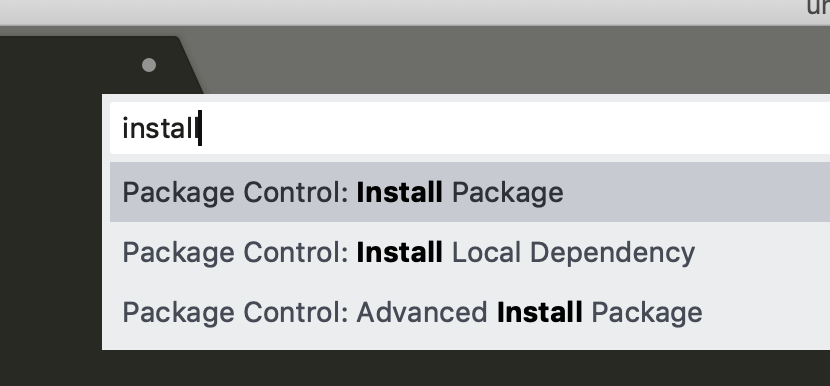
Pressing enter on “Package Control: Install Package” will take you to another dialog box where you can search for what you want to install, in this case “BracketHighlighter”. This plug-in makes it easy to see where your quotes, parenthesis, brackets, etc. start and and so you don’t miss closing them. More info here: https://packagecontrol.io/packages/BracketHighlighter
Now that you can install packages, install the following…
SerializedDataConverter, https://packagecontrol.io/packages/SerializedDataConverter – which will convert files from JSON to YAML and back. It will even autosave them after the convert. I will show how to do this after we are done installing what we need.
Pretty JSON, https://packagecontrol.io/packages/Pretty%20JSON – this will make your JSON code pretty. Fairly obvious.
CForm, https://packagecontrol.io/packages/CForm – this is the important one! This will help you start a template and add resource snippets, references, etc…
We have installed Sublime, ready. Installed our plug-ins, set. Now, we GO!
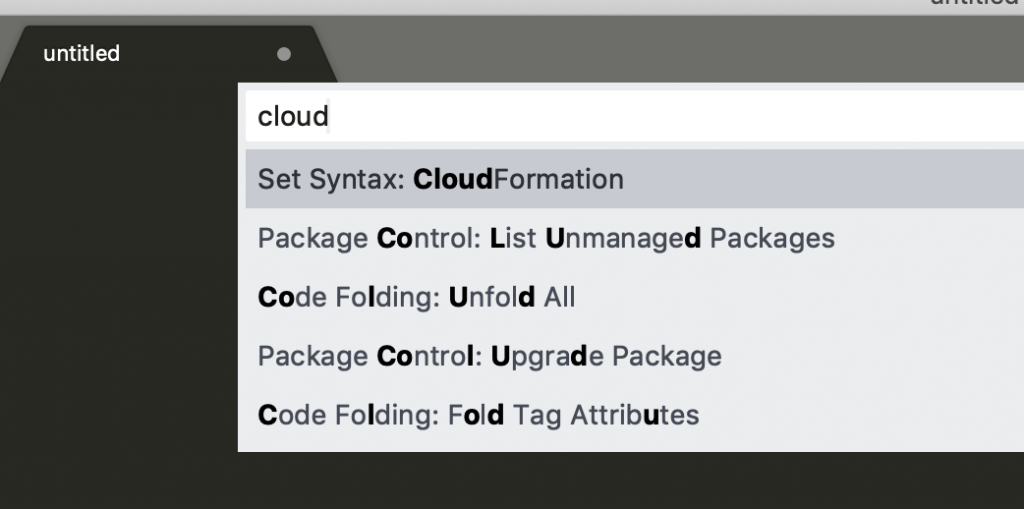
Create a new blank file and bring up the Command Palette and type in “cloud” to search for the CloudFormation syntax, shown here:
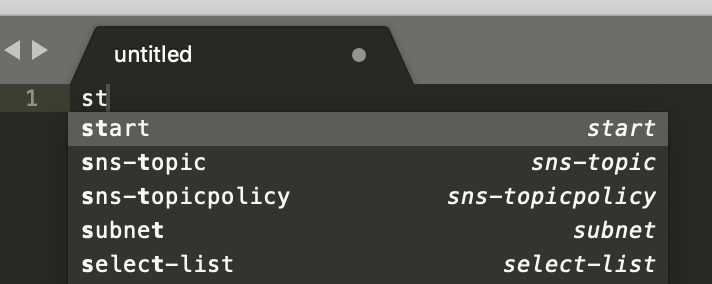
Hit enter. Now it seems like nothing happens, but at your cursor start typing “start” and you will see this:
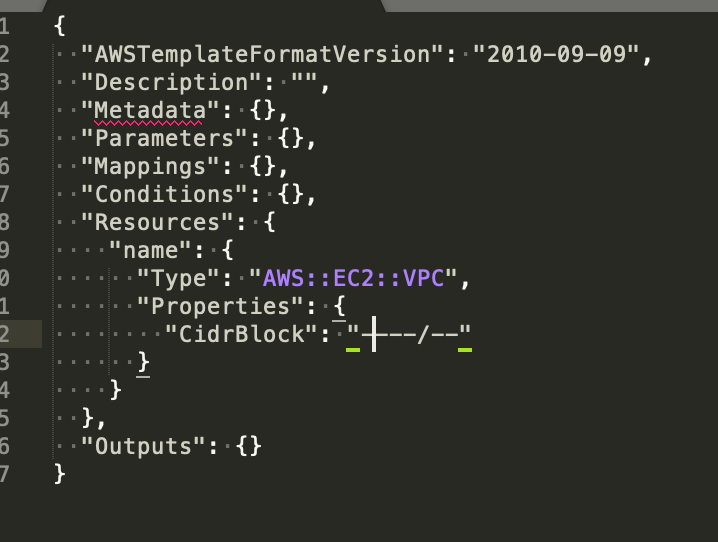
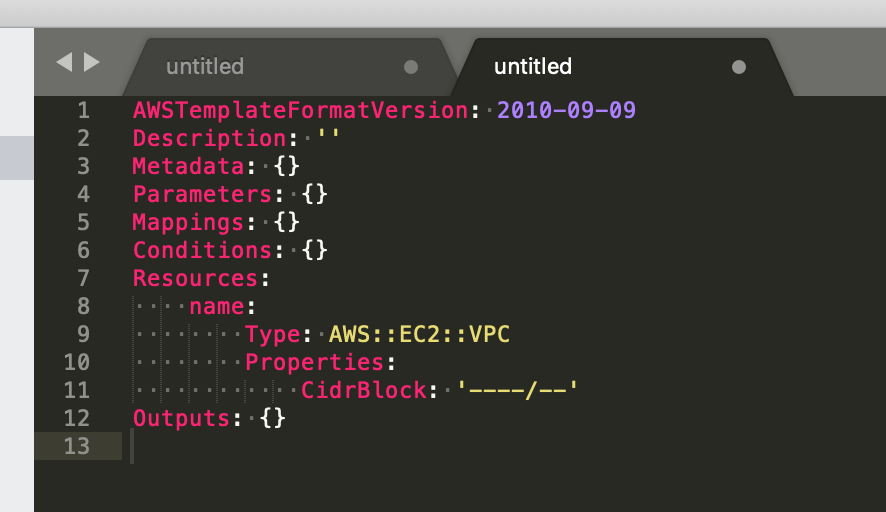
Hit tab, and you get a nice pre-formatted template of a JSON based CFN template! From here put your cursor into the Resources block on the line between the parenthesis and start typing “vpc”, when the the autocomplete dialog box comes up select “vpc” and hit tab and see the magic!
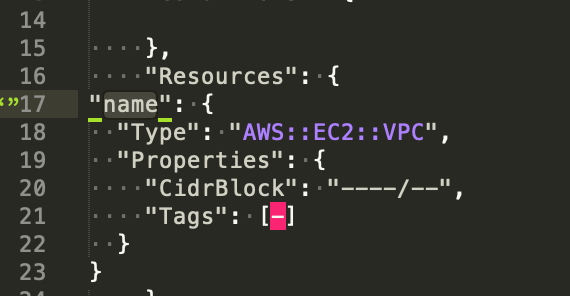
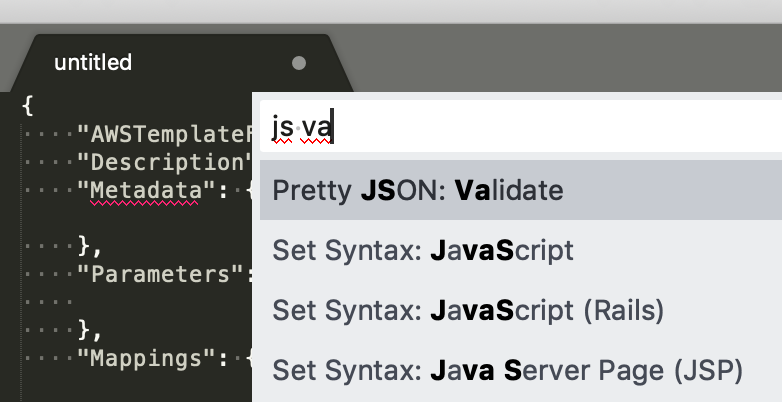
You can see that at “Tags” the JSON syntax doesn’t like your value here which is in pink, but that’s ok. You can remove that line AND the comma at the end of the line above it to preserve your JSON formatting. You can now validate your code by bringing up the Command Palette and typing “js va” and pressing enter. This will validate your code.
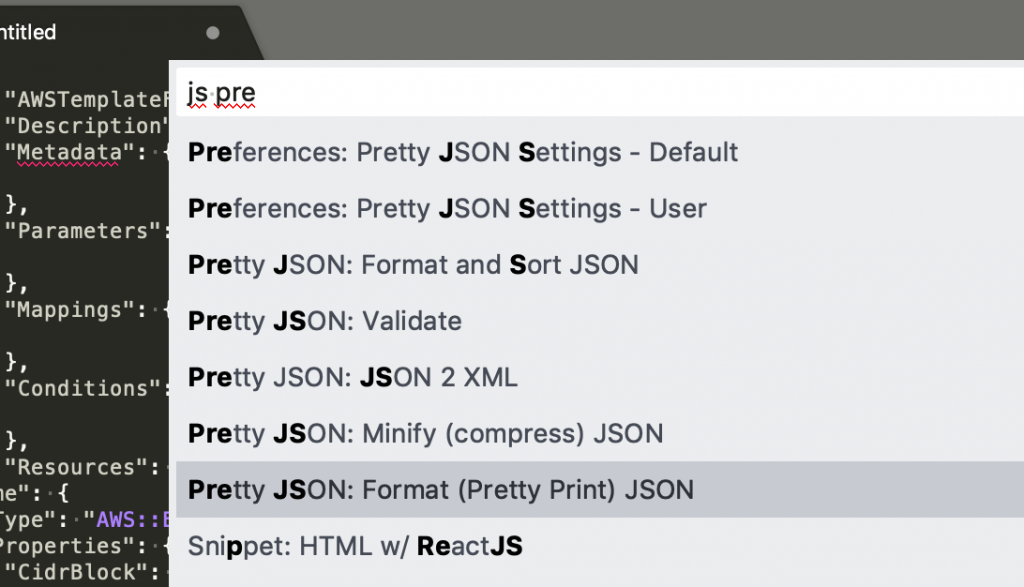
If it comes up as valid, which it should, you can make it pretty and save it to YAML (for your YAML coding friends). If it is not valid, it will try to show you where the last part of your JSON made sense so you can correct it. But considering it passes you can bring up the Command Palette and type “js pre” to format your code. It will go like this:
Now all you have to do is fill out the required properties, save and run it in AWS. To get a YAML copy, try this:
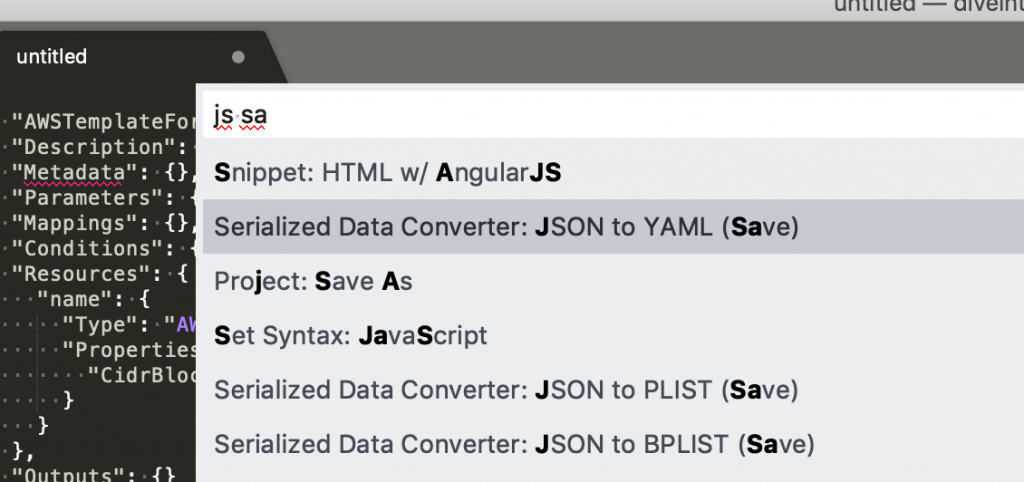
If you saved your JSON file, this will auto save it to the same name but instead of .JSON or .cform it will save it as .YAML.
A few notes to finish up. First, try out the snippets. You can create parameters, references, resources, outputs and the list goes on and on. Just type and tab to insert after selecting what you want. Second, you need to know what parts are required for each resource – the snippets do not include everything you can customize nor do they always have what is required by AWS. Also, there are not snippets for everything. Copy and paste from the AWS documentation is your friend for that.
Next, save often but check your syntax for JSON more often using the “js va” trick above. It will save you a lot of time.
There are a lot of other plug-ins you can grab like Trimmer or Alignment, but I shared my most used ones here. Props to all the people that wrote their respective packages, I literally could not do my job without you!
Also, if you find Sublime useful, please pay for it. Your personal license is good for any installs on any OS. It’s worth it.
For reference:
https://www.sublimetext.com/
https://packagecontrol.io/packages/BracketHighlighter
https://packagecontrol.io/packages/SerializedDataConverter
https://packagecontrol.io/packages/Pretty%20JSON
https://packagecontrol.io/packages/CForm
https://aws.amazon.com/cloudformation/
https://docs.aws.amazon.com/AWSCloudFormation/latest/UserGuide/gettingstarted.templatebasics.html
https://docs.aws.amazon.com/AWSCloudFormation/latest/UserGuide/cfn-supported-resources.html
Happy Building!
Very nice.
Just in time for me
thanks!
Awesome! If you have any suggestions for what you would like to see next, please let me know. I know it can be daunting, but it’s a very exciting to learn. Thanks, Jorge.
Salut ! Très bon post, même si il y faudrait rajouter quelques petits points à rajouter, l’article reste super intéressant.